Friday, June 28, 2013

Food Quote


“This is my invariable advice to people: Learn how to cook- try new recipes, learn from your mistakes, be fearless, and above all have fun!”


― Julia Child, My Life in France

Camp Food: Simple, Practical, Delicious


For many people this is a great time of year to be outdoors. The swelter of summer has yet to arrive and summer vacations are still a week or more away. In addition, places that attract throngs of people in high summer are still relatively quiet.


Here in the mountains Mother Nature has bestowed upon us an early spring. May is often a cold, wet, snowy/rainy month, but this year it's all about blue skies, sunshine and green grass. Dave and I decided to take advantage of this warm weather window and we took off camping for a few days this week.

Susan and Airstream 

In the vein of full disclosure, camping for us isn't about sleeping under the stars with only a downy layer between the bears and us. In our younger days a tent was adequate, but these days we travel in comfort. We've had an Airstream trailer for 6 years and have logged over 15,000 miles. We consider that camping.

Regardless of how you choose to spend the night in the great outdoors, food is an important component to any camping trip. I like to keep it simple and I try and make a few things ahead of time so we can just heat and eat.

As for equipment, if cooking directly over a campfire a well-seasoned cast iron skillet is a must. (For tips on seasoning and caring for cast iron, click here.) For Coleman stove or other gas-heat cooking methods, any heavy bottomed pan from your kitchen will work. I have both a skillet and a pot with me at all times, although most meals can be made in just one pan.

The key to meal planning is to include ingredients that can be used for multiple meals. Below is a typical menu for our 3-day camping trips, with tips on making the most of leftovers.

First off, a hearty, hot breakfast is key to starting out the day, especially in the mountains where it can be quite chilly before noon. My typical camping breakfast menus include:

Scrambled eggs with frozen hash brown potatoes
I toss many a leftover vegetable in my scrambled eggs. Onions, peppers, fresh spinach, mushrooms, tomatoes - they are all candidates for brightening up my eggs. If the veggies are uncooked, sauté them in a little olive or canola oil before adding the raw egg. Frozen potatoes have come a long way and make for a very easy and filling side dish. Check the ingredient list before you buy, and opt for those that are as close to 'just potatoes' as possible. You can always add your own salt and seasonings.

Pancakes and Bacon
Whole Wheat Oatmeal Pancakes with real maple syrup, bacon, sliced bananas
For the pancakes, I mix all of the dry ingredients together before we leave home. (I wrap the brown sugar tightly in plastic wrap so it doesn't dry out.) Leftover bacon (is there such a thing?) can be used in the Breakfast Tacos in lieu of chorizo sausage. Bananas are good for keeping our muscles strong during those long hikes and fishing trips, so we always have a few around the trailer.

Breakfast Tacos with scrambled eggs, chorizo sausage (optional), salsa, grated cheese and sour cream
I buy pre-cooked chorizo and cut it small before mixing it with the scrambled eggs. Tortillas, salsa, grated cheese and sour cream can be used both for the Breakfast Tacos and the Chicken Fajitas (see below.)


Lunch is light and easy. We usually head off to explore after breakfast so foods that travel well are a must. On our adventures we bring:

Slices of hard cheese (such as Manchego)
Hearty crackers such as Triscuits
Apples
Almonds mixed with dried cranberries
Hard-boiled eggs
Packages of tuna
Baby carrots

For salty snacks back at the campsite, I like to make popcorn (I just bring along the Whirly-Pop) and nibble on tortilla chips with salsa.

Dinners are typically cooked outside. For starch accompaniments (such as pasta and rice), I cook these at home. For pasta, I boil it according to the package instructions, drain it, toss it with a tablespoon or two of olive oil, and then spread it out on a baking tray to cool.  It keeps in a plastic bag in the refrigerator for 3 days or can be frozen. To reheat it prior to serving, I either toss it with a little water in a pan over medium heat or plunge it in boiling water for about 10 seconds. Rice can also be cooked, cooled on a baking tray and then stored either in the freezer or refrigerator in a manner similar to pasta.

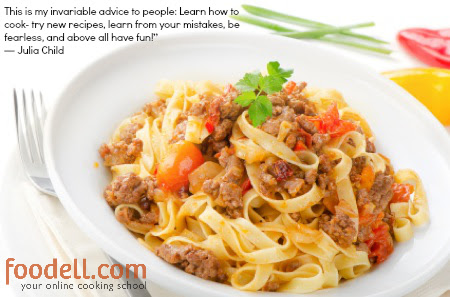
For this trip our dinner menus included:

Spaghetti with Meat Sauce, simple green salad, garlic bread
The spaghetti sauce can certainly be made in advance, but it is simple enough to cook in one pan over the stove.  For salads (and sandwiches), I bring a box of mixed greens since it travels well. I add green onions, carrot slices (from the baby carrots), and tomatoes and toss it with a simple vinaigrette (one part balsamic vinegar to 3 parts olive oil.) A large baguette can be used for the garlic bread.  I toast the bread cut-side-down in a skillet and then brush it with melted butter and crushed garlic.  Leftover baguette makes toast the next morning and/or a snack with cheese and an apple during the day.  

Dave O Burger 

Dave-O Burgers with cheese, Guacamole, lettuce and tomato
What's a Dave-O Burger? A cheeseburger cooked with loving attention by Dave Odell. He seasons grass-fed beef or bison with generous quantities of salt and pepper, cooks them until nicely browned on one side, flips them once and continues cooking until they reach medium doneness. They taste even better with a cold beer and side of tortilla chips.

Chicken Fajitas with Guacamole, grated cheese and sour cream
There is a lot of ingredient crossover here with the Breakfast Tacos. Also, I make a double batch of guacamole and use it for both the Dave-O burgers and the fajitas. Leftover fajita meat makes for a tasty lunch the next day.

Other dishes that are great to make ahead and take on camping expeditions include:

Black Bean and Vegetable Soup

Hmmm... what am I missing? Dessert, of course! I usually make bar cookies with substance, such as Oatmeal Chocolate Chip Cookies. I keep the candy supply to a minimum, as it's too easy to scarf down handfuls of the stuff, however, a few chocolate covered raisins around the trailer never hurts.

Some say that variety is the spice of life, but variety of food on camping trips simply means packing and unpacking more stuff. Planning your food so that the same ingredients are used multiple times makes good packing sense and means less waste.

Enjoy your outdoor adventures this year and remember - good cooking makes happy campers. Bon appétit!  


Dave fly fishing 

"You know when they have a fishing show on TV?  They catch the fish and then let it go.   They don't want to eat the fish, they just want to make it late for something." 

- Mitch Hedberg    

Wednesday, June 26, 2013

Tips for Freezing Fresh Food

On occasion we all buy too much food. We buy because something looks particularly tasty or because we think we'll be eating at home and then plans change. Many foods can be frozen with very little degradation in quality. Rather than waiting until those uneaten foods become a science experiment, here are some tips about freezing foods so you can enjoy them at a later date.
When freezing foods, there are five simple rules to remember.
1.  Label EVERYTHING.
It may seem obvious today that a bag contains 2 cooked chicken breasts, but 3 months from now or even next week it will be unidentifiable. Include a description of the food, the date and if possible, the quantity (either weight or number of servings.)

2.  When possible, freeze foods flat.
Put the food in a freezer bag, squeeze out as much air as possible, and then lay the bag on its side on a baking sheet.  This works for liquids as well as solids.  Once the contents are frozen, you can stack the bags in tidy rows to minimize space requirements.

3.  Air is the enemy of frozen foods.
Your best bet is to either buy a vacuum sealer which sucks out all the air or use sturdy plastic zippered bags that allow you to squeeze out most of the air before freezing.

4.  Save and freeze even small portions of food.
Even if your leftovers consist of a single slice of bacon, save it!  Put these remnants in freezer bags and just keep adding to the bags when you get more of the same.  The next time you pull a steaming baked potato from the oven you'll be thrilled when you open the freezer and discover that one little strip of bacon to crumble over the top.

5.  When you're cooking, make extra and plan on freezing some for later.
Time is short, so if you make the effort to cook make sure you can enjoy the results at least twice.  Knowing that you're going to be saving things for later also takes away the incentive to help yourself to seconds.  Which would you rather do - stuff yourself now or have a complete pre-cooked meal waiting for you another day?

Now that we've established the rules, here are suggestions for freezing 10 of the most common and most perishable foods in your fridge.

1.  Meat
Fresh, raw meat should be wrapped really well with plastic wrap, using two or three layers if necessary to keep the meat protected from the air.  Freeze the meat on or before its 'best by' date so you'll have a day or two to eat it once it's thawed.

2.  Seafood
First off, buy seafood that is either fresh or frozen; avoid buying seafood that is labeled 'previously frozen'.  Freezing fresh seafood is okay and keeping frozen seafood frozen a little bit longer is fine, but re-freezing thawed seafood will adversely affect the quality.  Like meat, wrap fish well with plastic wrap.  For shrimp and scallops and the like, use plastic baggies and squeeze out as much air as possible.

3.  Cheese
Well-wrapped soft and hard cheeses freeze pretty well, but in-between cheeses like Monterey Jack and cheddar should first be grated before being frozen in plastic zippered bags.

4.  Extra stock or wine
Whether you make your own stock or buy the boxed variety, don't waste any of it.  Fill up ice cube trays or other small containers (leave a little room at the top for expansion) with your precious liquids like stock and wine and they'll come in handy for sauce making.

5.  Fresh herbs
Fill an ice cube tray with chopped herbs and top each compartment with a little water.  Once frozen, you can store the herb cubes in plastic bags. Another idea is to make pesto sauce with extra basil, cilantro or parsley (click here for the basic recipe).  Place the pesto in small zippered bags and freeze them flat. You can also mix fresh herbs with softened butter (see video, "Compound Butter") and freeze it for later use as a quick sauce (once melted) or a spread for bread.

6.  Leafy greens
Greens such as spinach, kale, arugula, chard, and collards should be blanched before freezing. Just plunge them in a large pot of boiling water for a few seconds and then drain and blot dry.  Freeze in plastic zippered bags and use them in cooked dishes such as omelets, stir-fries and gratins.

7.  Vegetables
Vegetables should be prepped for use before freezing.  Onions and carrots should be peeled and chopped, beans should be trimmed, celery should be sliced and broccoli and cauliflower should be cut into florets.  Many vegetables also benefit from blanching before freezing.  Green beans, carrots, asparagus, snow peas, broccoli and cauliflower should be plunged in boiling water for 3 to 5 minutes, drained and blotted dry and then frozen.  Vegetables that contain a lot of water such as celery, mushrooms and zucchini should be sliced and frozen raw, preferably in airtight bags.

8.  Citrus fruits
Squeeze the juice from oranges, lemons, limes and such and freeze it in ice cube trays.  Once frozen, the citrus cubes can be stored in a zippered plastic bag.

9.  Other Fruits
Just before bananas turn completely dark, peel them, wrap them well in plastic wrap, and freeze them. Frozen bananas are perfect for smoothies and banana bread. For berries, place them on a baking tray and freeze them.  Once frozen, put them in a freezer bag and remove them as needed (smoothies, cobblers, ice cream, etc.) Tropical fruits and melons should be peeled and cut into chunks before freezing; treat them as you would berries. Apples and pears should be cooked before freezing. Make a compote and keep it on hand for a quick dessert.

10.  Tomatoes
Fresh tomatoes can simply be quartered, placed on a baking tray and frozen.  Once frozen, the skin will peel off and you can store the quarters in a zippered plastic bag.  Use them for making any dish that calls for canned tomatoes.
Freezing foods before they go bad will save you time (one less trip to the grocery store!) and money (no more wasted food!).  When planning your meals, plan to eat out of the freezer at least one day per week. You'll be amazed at the dishes you can concoct when you have a variety of ingredients already on hand.  Bon appetit!
- See more at: http://www.foodell.com/articles/tips-for-freezing-fresh-food#sthash.9omIHmCH.dpuf


Sunday, June 23, 2013

Seeds of Change: Thoughts on Heirloom Foods


Seeds of Change  


heirloom |ˈe(ə)rˌloōm| 
 noun; a valuable object that has belonged to a family for several generations

So says Mr. Webster.  But what does it mean when we talk about heirloom foods, such as heirloom tomatoes?
Basket of HeirloomsPretty much the same thing, in fact, but rather than antique clocks and silver vases, we're referring to plant seeds.  Heirloom tomatoes, for example, (or heritage tomatoes as they are known in some countries) are non-hybrid tomatoes that have been selectively bred over generations.  They are known for their alluring, bulbous shapes with a scalloped exterior and can be found in a spectrum of colors including yellow, green, all shades of red and even striped.  The varietal names are also intriguing - Brandywine, Cherokee Purple, Hillbilly and Mortgage Lifter to name a few.

But where food is concerned, heirloom doesn't stop with tomatoes.  There are Bumble Bee beans, Bull's Blood beets, Dragon carrots, Lemon Drop peppers, and many thousands of other varieties still in existence. 

These once common breeds nearly disappeared when it was determined that tomatoes and other delicate summer fruits and vegetables could be grown in the middle of winter in a warm climate and shipped to cold climate regions, as long as they were highly transit-able, very hardy and could be picked well in advance of when they would naturally ripen on the vine.  Thus Big Agriculture created through cross-breeding the toughest fruit and vegetable varieties, and it is mostly these that we find in our grocery stores even during prime growing season. 

While many consumers welcome the 'progress' that allowed these summer favorites to be available year round, flavor and uniqueness have drastically suffered.     

Happily, some dedicated farmers are bringing back to life the almost extinct varieties that wereColorful carrotsonce widely grown. They are more expensive than today's common varieties because a lot of care must be taken in the growing and harvesting.  Also, they are typically more perishable.  That's a good thing; it means that the heirloom foods you find in your local store were grown somewhere near you and are much fresher as a result. 

Farmers markets are a terrific source of heritage varietals, as is your own backyard.  Personally, my thumb has never been green and living at 7,000 feet has not helped my gardening ability.  Thankfully, I support our local farmers and have been rewarded with heritage varieties of cherries, apples, tomatoes, peaches and greens.

If you are the green thumb type, help is at hand if you want to grow your own heirloom tomatoes and other fruits and vegetables.  The best (and most economical) way is to start by purchasing some heirloom seeds, planting them, and then saving the seeds from the plants at the end of the growing season.

The Seed Savers Exchange (SSE) is a non-profit organization dedicated to stopping the erosion of genetic diversity in our foods by encouraging growers to plant heirloom varietals.  Their website is a wealth of information.

The SSE sells many varieties of heritage seeds online, and members gain access to over 12,000 more varieties through a member-to-member exchange catalog.  You may also be able to find seed exchange events in your community; check with your local nursery or community garden.  

Seed To Seed
If you already have an heirloom plant or seeds, there is a tool on the SSE site where you can enter the name of the vegetable, flower or herb and up pops a brief explanation of how to germinate, grow and save the seeds. 
   
For more in-depth instructions, the book, "Seed to Seed" by Suzanne Ashworth is considered one of the best references on the subject.  It provides all of the information you'll need to produce and store heirloom seeds for your home garden.  

On an international level, saving seeds and preserving genetic diversity of foods is important to the world's food supply.  The more Big Agriculture narrows its focus to grow only the heartiest, most travel-friendly crops, the more susceptible the crops are to blight. 
    
On a personal level, growing and /or consuming heritage fruits and vegetables is highly satisfying.  Not only do we help the environment with genetic diversity, we also get to savor the superior flavor of these old-time crops.  Better flavor also means less cooking; keep the preparation simple and let the natural sweetness or earthiness shine through.  
Heirloom tomato salad

Thursday, June 20, 2013

Free Trial Cooking Class


Still not sure that the online cooking school is for you?  Take this free trial class - Beginner / Pan Searing Beef and Pork -  and see what you think (The video above is from the class). 

You'll learn to properly sear meat to ensure a deliciously brown, caramelized crust and a perfectly moist interior!  - Chef Susan

*If you're ready to enroll now, monthly tuition is available: http://www.foodell.com/learn

Wednesday, June 19, 2013

Don't Fear the Mayonnaise


We all know that mayonnaise is a delicious, rich spread that turns bad if not refrigerated. Or does it?

"Contrary to popular belief, industrial mayo does not spoil if not refrigerated. Commercial mayonnaise is filled with acid and preservatives that can actually extend the life of salads by killing bacteria. The eggs used in prepared mayonnaise are pasteurized as well."

This quote is from the Fooducate Blog, a great collection of vignettes on a variety of food matters. And this writer isn't the only one who has declared commercial mayonnaise virtually unspoilable.

The key is in the word commercial.

Homemade mayonnaise consists of raw egg yolks, oil, vinegar and sometimes seasonings such as mustard, lemon or garlic. The shelf life for this type of mayo is far more limited (about 3 days), and it should definitely be kept in the refrigerator. You can use pasteurized eggs in your mayonnaise, but even so the risk of attracting bad bacteria at room temperature is high due to the lack of bacteria killing acids and preservatives.


So there you have it. Bring on the potato salad, prepare the deviled eggs and don't forget the coleslaw. Bon appétit!

Deviled eggs are a picnic favorite and are simple to make. See the recipe on our website at: http://www.foodell.com/recipes/deviled-eggs